Spring Security 로그인&회원가입
2023-02-02
1.프로젝트 생성
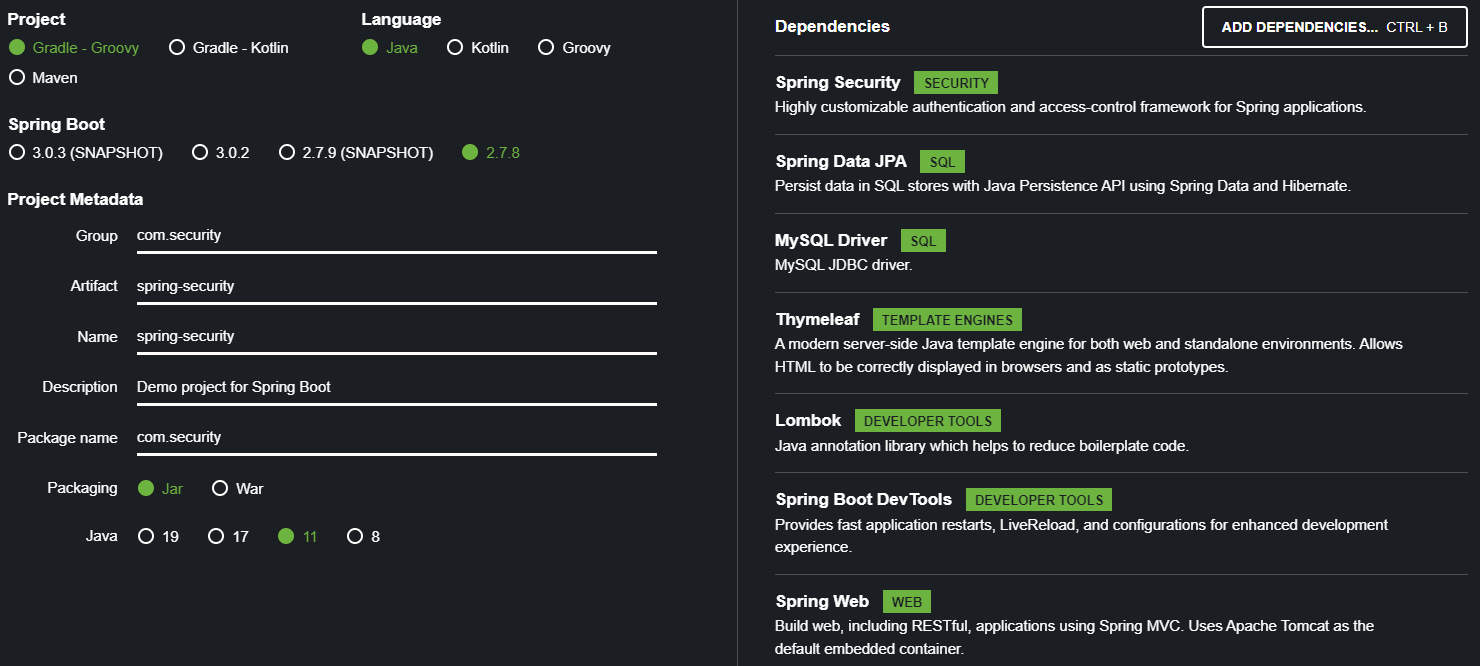
https://start.spring.io/ 를 통해 프로젝트 생성 및 Dependencies를 추가한다.
2.application.yml 설정
server:
  port: 8080
  servlet:
    context-path: /
    encoding:
      charset: UTF-8
      enabled: true
      force: true

spring:
  datasource:
    driver-class-name: com.mysql.cj.jdbc.Driver
    url: jdbc:mysql://localhost:3306/DB스키마명?serverTimezone=Asia/Seoul
    username: /*DB아이디*/
    password: /*DB패스워드 */

  mvc:
    view:
      prefix: /templates/
      suffix: .html

  jpa:
    hibernate:
      ddl-auto: update #create update none
      naming:
        physical-strategy: org.hibernate.boot.model.naming.PhysicalNamingStrategyStandardImpl
    show-sql: true
3.Tomcat 서버 실행
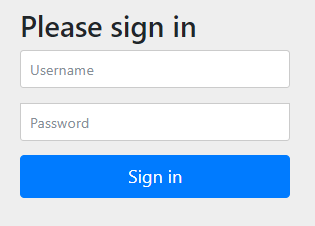
application.yml 설정 후 서버를 실행한 뒤에
http://localhost:8080/ 로 접속해면 /login으로 이동하면서 Spring Security에서 기본적으로 제공해주는 화면이 나타난다.
Username는 user, Password는 서버 실행 시 아래와 같이 알려준다.

4.HomeController & Index 설정
HomeController.java
@Controller
public class HomeController {
    @GetMapping({"","/"})
    public String Home(){
        return "index";
    }
}
Index.html
<!DOCTYPE html>
<html lang="en">
<head>
    <meta charset="UTF-8">
    <title>Index 페이지</title>
</head>
<body>
    Index 페이지 입니다.
</body>
</html>
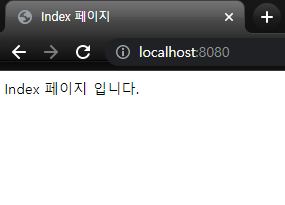
모든 경로를 Spring Security가 통제하기 떄문에 로그인을 해야 원래 이동하려 했던 경로로 자동이동이 된다. 로그인 후 / 로 이동하면 Index 페이지 확인이 가능해진다.
5.SecurityFilterChain
//@Configuration
@EnableWebSecurity
public class SecurityConfig {

    @Bean
    public SecurityFilterChain securityFilterChain(HttpSecurity http) throws Exception {
        http.csrf().disable();

        http.authorizeRequests()
            .antMatchers("/user/**").authenticated()
            .antMatchers("/manager/**").access("hasRole('ROLE_MANAGER') or hasRole('ROLE_ADMIN') ")
            .antMatchers("/admin/**").access("hasRole('ROLE_ADMIN')")
            .anyRequest().permitAll();

         http.formLogin()
                .loginPage("/login")
                .loginProcessingUrl("/loginProc")
                .defaultSuccessUrl("/")
                .and()
                .logout()
                .logoutUrl("/logout")
                .logoutSuccessUrl("/login");

        return http.build();
    }

}
Spring Security 5.7.0-M2 부터 컴포넌트 기반의 보안 설정을 권장한다는 이유로 WebSecurityConfigurerAdapter 가 Deprecated 처리되고 SecurityFilterChain을 사용하는걸 권장한다.
| 어노테이션 | 설명 |
|---|---|
| @Configuration | 빈 설정을 담당하는 클래스를 등록하기 위한 어노테이션 이 클래스 안에서 @Bean 어노테이션이 동봉된 메소드를 선언하면 그 메소드를 통해 스프링 빈을 정의하고 생명주기를 설정하게 된다. |
| @EnableWebSecurity | @EnableWebSecurity을 보면 WebSecurityConfiguration.class, SpringWebMvcImportSelector.class, OAuth2ImportSelector.class, HttpSecurityConfiguration.class들을 import 되어있다.이 어노테이션을 쓸 경우 @Configuration,@EnableGlobalAuthentication가 포함되어 있어 생략할수 있다. |
| 메소드 | 설명 |
|---|---|
| .csrf().disable() | Cross Site Request Forgery(사이트 간 요청 위조) 공격을 disable(방지) |
| .authorizeRequests() | 메소드로 특정한 경로에 특정한 권한을 가진 사용자만 접근할 수 있도록 설정 |
| .antMatchers(“”) .authenticated() | 특정 경로에 대해서 권한 설정 및 인증된 사용자면 접근 가능 |
| .antMatchers(“”) .access() | 특정 경로에 대해서 접근 권한 설정 |
| .anyRequest().permitAll() | 특정 경로 외 나머지 경로들의 접근을 인증절차 없이 허용 |
| .formLogin() | 로그인 페이지와 기타 로그인 처리 및 성공 실패 처리를 사용 |
| .loginPage(“”) | 특정 경로로 로그인 페이지 설정 |
| .loginProcessingUrl(“”) | 로그인 인증 처리하는 URL 설정, 특정 경로가 호출되면 인증처리 수행하는 필터가 호출 |
| .defaultSuccessUrl(“”) | 로그인 성공시 특정 경로로 페이지 이동 |
※참조 https://docs.spring.io/spring-security/reference/servlet/authorization/authorize-http-requests.html
6.UserDetails
Spring Security에서 사용자의 정보를 담는 인터페이스
사용자의 정보를 불러오기 위해서 구현해야 하는 인터페이스로 기본 오버라이드 메서드들이 존재한다.
public class PrincipalDetails implements UserDetails {
    private User user;

    public PrincipalDetails(User user){
        this.user = user;
    }

    @Override
    public Collection<? extends GrantedAuthority> getAuthorities() {
        Collection<GrantedAuthority> collect = new ArrayList<>();
        collect.add(new GrantedAuthority() {
            @Override
            public String getAuthority() {
                return user.getRole();
            }
        });

        return collect;
    }

    @Override
    public String getPassword() {
        return user.getPassword();
    }

    @Override
    public String getUsername() {
        return user.getUsername();
    }

    @Override
    public boolean isAccountNonExpired() {
        return true;
    }

    @Override
    public boolean isAccountNonLocked() {
        return true;
    }

    @Override
    public boolean isCredentialsNonExpired() {
        return true;
    }

    @Override
    public boolean isEnabled() {
        return true;
    }
}
| 메소드 | 리턴 타입 | 설명 | 기본값 |
|---|---|---|---|
| getAuthorities() | Collection<? extends GrantedAuthority> | 계정의 권한 목록을 리턴 | |
| getPassword() | String | 계정의 비밀번호를 리턴 | |
| getUsername() | String | 계정의 고유한 값을 리턴 | |
| isAccountNonExpired() | boolean | 계정의 만료 여부 리턴 | true ( 만료 안됨 ) |
| isAccountNonLocked() | boolean | 계정의 잠김 여부 리턴 | true ( 잠기지 않음 ) |
| isCredentialsNonExpired() | boolean | 비밀번호 만료 여부 리턴 | true ( 만료 안됨 ) |
| isEnabled() | boolean | 계정의 활성화 여부 리턴 | true ( 활성화 됨 ) |
getUsername()를 username값으로 고정하는게 아닌 테이블의 PK값을 넘겨받아 사용할수 있다.
7.UserDetailsService
Spring Security에서 사용자의 정보를 가져오는 인터페이스
사용자의 정보를 불러오기 위해서 구현해야하는 인터페이스로 기본 오버라이드 메서드가 존재한다.
@Service
public class PrincipalDetailsService implements UserDetailsService {

    @Autowired
    private UserRepository userRepository;

    @Override
    public UserDetails loadUserByUsername(String username) throws UsernameNotFoundException {

        User userEntity = userRepository.findByUsername(username);

        if(userEntity != null)
            return new PrincipalDetails(userEntity);

        return null;
    }
}
| 메소드 | 리턴 타입 | 설명 |
|---|---|---|
| loadUserByUsername | UserDetails | 유저의 정보를 불러와서 UserDetails로 리턴 |
8. 회원가입 User, RoleType, UserController, UserRepository, JoinForm
@Setter @Getter
@Entity
public class User {
    @Id // primary key
    @GeneratedValue(strategy = GenerationType.IDENTITY)
    private int id;

    @Column(unique = true)
    private String username;

    private String password;
    private String email;
    private String role; //ROLE_USER, ROLE_MANAGER ,ROLE_ADMIN
    @CreationTimestamp
    private Timestamp createDate;
}
public enum RoleType {
    ROLE_USER("유저"), ROLE_MANAGER("매니저"), ROLE_ADMIN("관리자");

    private final String description;

    RoleType(String description) {
        this.description = description;
    }

    public String getDescription() {
        return description;
    }
}
@Controller
public class UserController {

    @Autowired
    UserRepository userRepository;

    @Autowired
    BCryptPasswordEncoder bCryptPasswordEncoder;

    /* 회원가입 Form 이동 */
    @RequestMapping(value = "/join", method = RequestMethod.GET)
    public String joinForm(Model model){

        model.addAttribute("roleTypes", RoleType.values());

        return "/common/joinForm";
    }

    /* 회원가입 Process */
    @RequestMapping(value = "/joinProc", method = RequestMethod.POST)
    public String join(User user){

        String rawPassword = user.getPassword();
        String encPassword = bCryptPasswordEncoder.encode(rawPassword);
        user.setPassword(encPassword);

        userRepository.save(user);

        return "redirect:/login";
    }
}
public interface UserRepository extends JpaRepository<User, Integer> {
    public User findByUsername(String username);
}
<!DOCTYPE html>
<html xmlns:th="http://www.thymeleaf.org">
<head>
  <meta charset="UTF-8">
  <title>회원가입 페이지</title>
</head>
<body>
<h1>회원가입 페이지</h1>
<hr/>
<form action="/joinProc" method="post">
  <input type="text" name="username" placeholder="Username"/> <br/>
  <input type="password" name="password" placeholder="Password"/> <br/>
  <input type="email" name="email" placeholder="Email"/> <br/>
  권한<br/>
  <span th:each="type : ${roleTypes}">
    <input type="radio" name="role" th:value="${type.name()}">
    <label th:text="${type.description}+'('+${type.name()}+')'"></label>
  </span><br/>
  <button type="submit">회원가입</button>
</form>
</body>
</html>
9. 페이지 접근 권한 설정
        http.authorizeRequests()
            .antMatchers("/user/**").authenticated()
            .antMatchers("/manager/**").access("hasRole('ROLE_MANAGER') or hasRole('ROLE_ADMIN') ")
            .antMatchers("/admin/**").access("hasRole('ROLE_ADMIN')")
            .anyRequest().permitAll();
@Controller
public class PageController {

    /* ROLE_USER 권한 페이지*/
    @GetMapping("/user")
    public @ResponseBody String user() {
        return "user";
    }

    /* ROLE_MANAGER 권한 페이지*/
    @GetMapping("/manager")
    public @ResponseBody String manager() {
        return "manager";
    }

    /* ROLE_ADMIN 권한 페이지*/
    @GetMapping("/admin")
    public @ResponseBody String admin() {
        return "admin";
    }

    @Secured("ROLE_ADMIN")
    @GetMapping("/privacy")
    public @ResponseBody String info(){
        return "개인정보(ROLE_ADMIN 확인가능)";
    }

    @PreAuthorize("hasRole('ROLE_MANAGER') or hasRole('ROLE_ADMIN')")
    @GetMapping("/data")
    public @ResponseBody String data(){

        return "데이터 정보(ROLE_MANAGER or ROLE_ADMIN 확인가능)";
    }
SecurityFilterChain에서 .anyMatchers()의 .authenticated(),.access() 를 통해 권한 설정하는 방법 말고 Security Config에서 @EnableWebSecurity추가 한뒤에 Controller 에서 @Secured와 @PreAuthorize를 사용할 수도 있다.
| 어노테이션 | 설명 |
|---|---|
| @Secured(“ROLE_USER”, “ROLE_ADMIN”) | 표현식은 사용할 수 없고 OR문만 표현할 수 있다. |
| @PreAuthorize(“hasRole(‘ROLE_MANAGER’) or hasRole(‘ROLE_ADMIN’)”) | Spring EL(표현식)을 사용할 수 있고, AND나 OR 같은 표현식도 사용 할수 있다. |
댓글남기기